-
tel:
+86-13606193016 -
email:
info@suhangmachine.com

Installing and Styling Your Colorbond Fence: A Guide to Perfection
Nov 05, 2025
Installing and Styling Your Colorbond Fence: A Guide to Perfection
Introduction: From Components to Completion
In our first blog, we explored the "what" and "why" of Colorbond fencing, breaking down the critical roles of the posts, rails, and panels. Now, let's focus on the "how." A perfect Colorbond fence is the result of three key elements: flawless installation, thoughtful design choices, and simple, ongoing care. This guide will walk you through the entire journey, from planning your fence to keeping it looking immaculate for years to come.
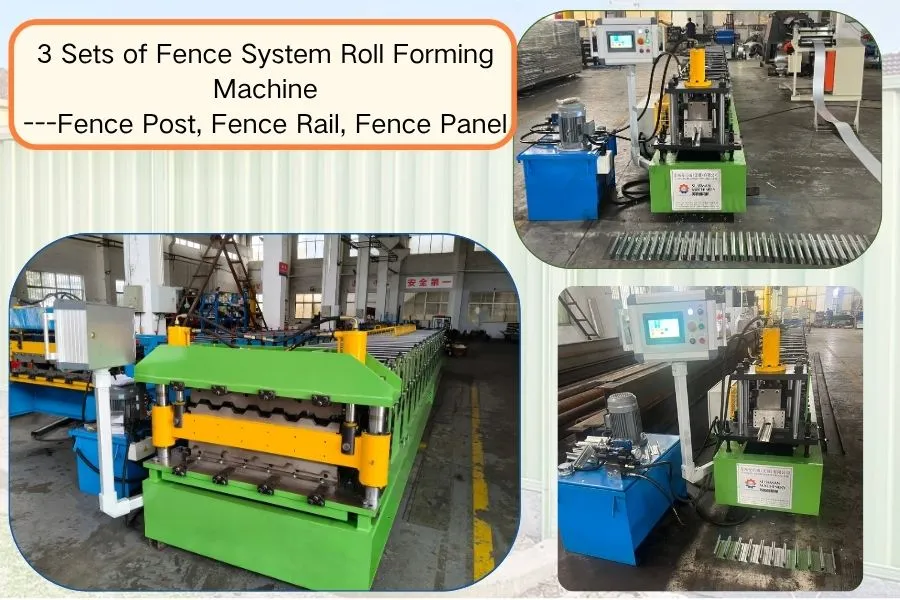
The Installation Process: A Step-by-Step Overview
While professional installation is highly recommended, understanding the process ensures you can manage your project effectively and recognise quality workmanship.
Step 1: Planning and Preparation
-
Check Regulations: Always contact your local council to understand boundary regulations, height restrictions (typically 1.8m for rear boundaries, 1.2m for front), and whether you need a development application.
-
Dial Before You Dig: This free service is non-negotiable. It locates underground utilities like gas, water, and electricity to prevent dangerous and costly strikes.
-
Mark the Boundary: Precisely mark your fence line with string lines. A surveyor may be required for uncertain boundaries.
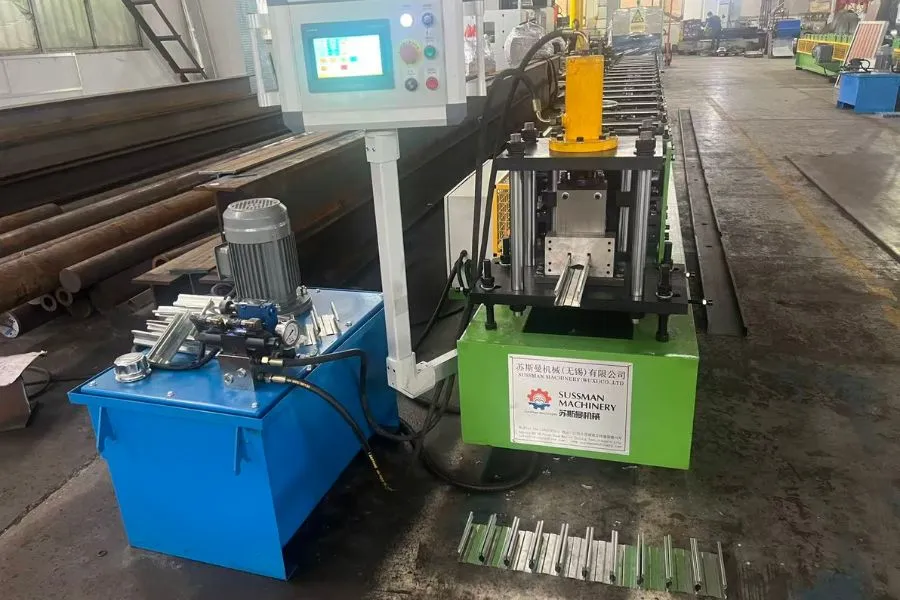
Step 2: Setting the Foundation - Post Installation
This is the most critical phase. If the posts are wrong, the entire fence will be wrong.
-
Digging Post Holes: Holes are dug at the predetermined centres (e.g., 2.4m). The depth is crucial—often 600mm deep or more, depending on soil type and wind load.
-
Concreting the Posts: Posts are set in the holes, meticulously aligned using a spirit level, and then concreted in place. The concrete must be mixed to the correct consistency and sloped away from the post to ensure water runoff. The posts must be allowed to cure completely (usually 24-48 hours) before any further work.
Step 3: Attaching the Skeleton - Rail Fixing
-
Once the posts are secure, the top and bottom rails are fixed horizontally between them. A string line is used to ensure they are perfectly level and at the correct height. This creates the framework that will hold the panels.
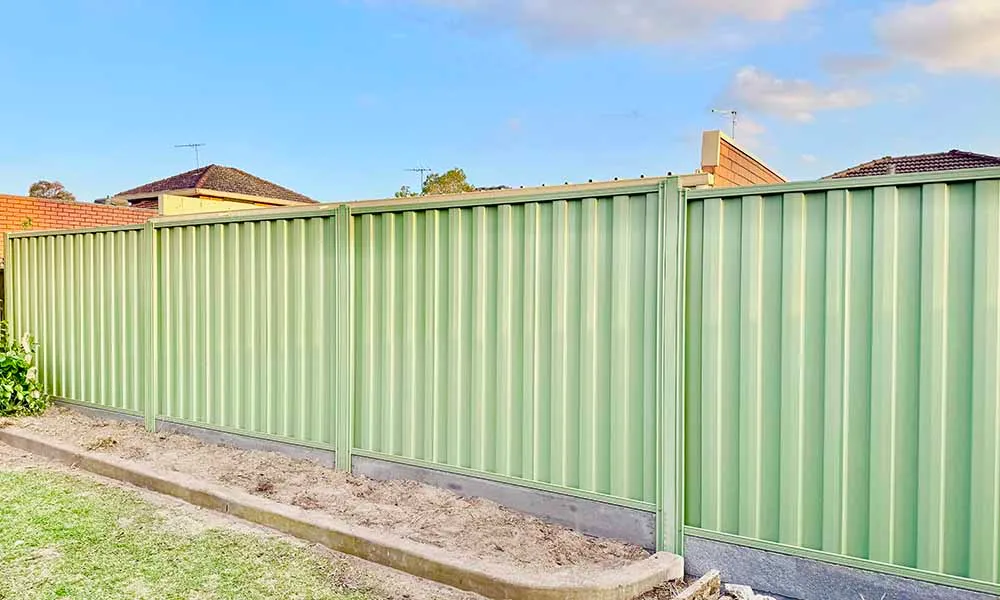
Step 4: The Final Layer - Panel Installation
-
Slotting Panels: The Colorbond sheets are carefully slotted vertically into the rail channels.
-
Screwing Off: Each panel is secured to the posts using colour-matched, self-drilling screws with neoprene washers. The screws should be driven in straight and not over-tightened, which can distort the washer and compromise the seal.
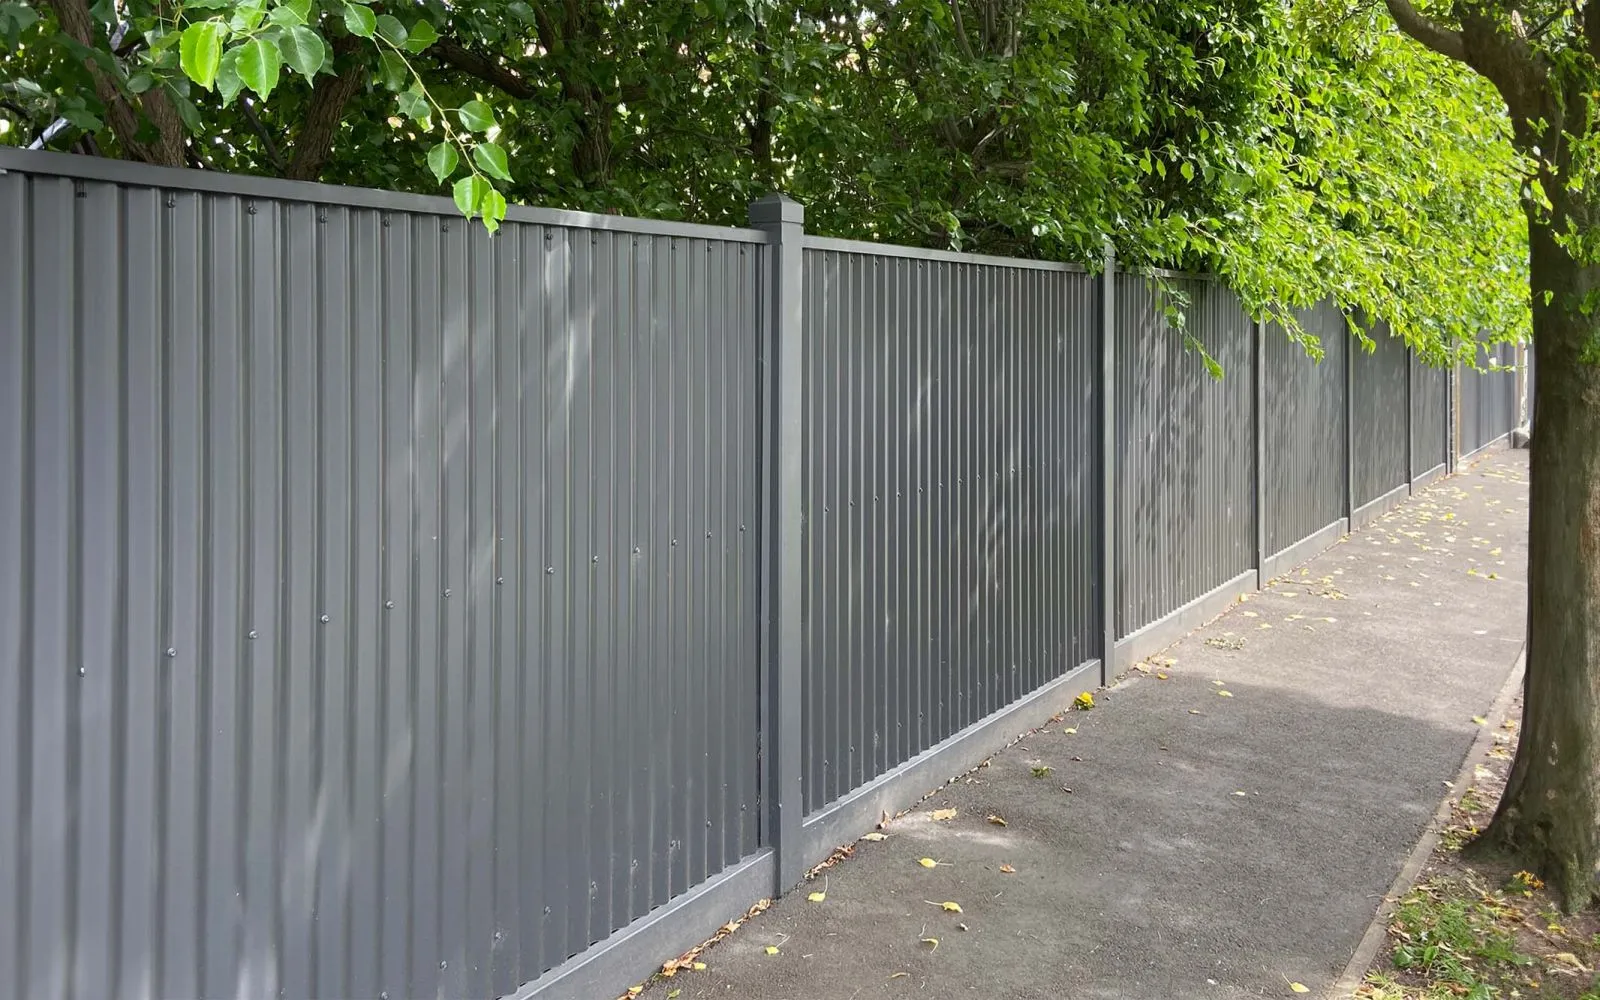
Design and Styling: Beyond the Basic Boundary
A Colorbond fence doesn't have to be a plain wall. Here are some popular trends to elevate your outdoor aesthetic:
-
The Mixed-Material Look: Break up the solid panels by incorporating other materials.
-
Colorbond and Timber: Use timber posts and capping with Colorbond infill panels for a warm, modern-rustic feel.
-
Laser-Cut Screens: Add decorative laser-cut steel screens to the top section of the fence for a touch of elegance and filtered light.
-
-
Feature Walls and Horizontal Lines:
-
Create a feature wall in your garden by using a contrasting colour like ‘Terrain’ or ‘Manor Red’.
-
Some installers now offer horizontal panel installation for a bold, contemporary look that stands out from the traditional vertical runs.
-
-
Curved and Sloping Fences: Colorbond is versatile enough to be installed on sloping blocks. A stepped or raked design follows the land's contour gracefully, maintaining privacy and a clean line.
Maintenance and Care: Ensuring a Lifetime of Service
While famously low-maintenance, a little care goes a long way.
-
Cleaning: Simply hose down your fence every 6-12 months to remove dust and grime. For stubborn dirt or mildew, use a soft brush and a mild detergent solution, then rinse thoroughly. Avoid harsh chemicals or abrasive cleaners.
-
Inspections: After extreme weather, do a quick visual check for any damage to panels or loose screws. Tighten any fasteners as needed.
-
Garden Beds: Avoid constantly saturated soil directly against the base of the fence. Ensure garden beds are well-drained to prevent prolonged moisture contact.
-
Rust: While the coatings are highly resistant, if the steel is scratched down to the bare metal, touch it up immediately with a Colorbond touch-up paint pen to prevent corrosion.


Conclusion: Your Fence, Your Legacy
A well-planned and professionally installed Colorbond fence is more than a boundary; it’s a key feature of your home’s exterior that adds security, privacy, and significant curb appeal. By making informed decisions about the installation, embracing creative design possibilities, and performing simple routine maintenance, you are not just building a fence—you are investing in a durable, beautiful asset that will enhance your property for decades. Embrace the possibilities and build a fence that truly reflects your Australian home.
If you are interested in, welcome to inquiry!


Related News

October 26, 2016
The Most Successful Engineering Contractor
.webp?x-oss-process=image/resize,w_100/quality,q_100)
.webp?x-oss-process=image/resize,w_100/quality,q_100)

Jun 24, 2026
Everything You Need to Know About Unistrut Channels

Contact US
Product Information
Quantity
Unit
Piece
Support order samples, customization, wholesale direct, and complete payment. If the product you look for does not have corresponding customized content, pls fill out the form below to contact us, and we will reply ASAP.